Monday, September 23, 2013

Neutral Wedding Palette Wedding

Happy Monday! This week we present a "Neutral Wedding Palette". Lots of ideas for your wedding day!
 First we start off with invitations from Wedding Paper Divas. These have a more modern feel to them for those who don't want a "frilly" feel to their wedding day.
 But if you want something that feels a bit more Vintage or Classic then these, also from Wedding Paper Divas, cost about $1.30 per invitation so they are affordable as well as beautiful! 
 Greet your guests with a charming directional sign to your ceremony space. Easy to DIY or to pick up on Etsy.
 "Nude" "Champagne" "Ivory" are all names for "off white". These colors offset your white dress gently. Because they are in the same color palette they compliment your dress perfectly.
 You don't have to remove color from your wedding, just choose muted colors that fall inside that neutral color palette. Pink, sage, peach, butter yellow all fall in that neutral palette so they will work for your wedding day!
 If flowers are not your thing then you can substitute them with a beautiful fabric bouquet. This one from Etsy costs the same as a real flower bridal bouquet but you get to keep it forever!
 Looking for a way to show off your "something blue" without flashing a bright color at your neutral colored wedding? These stick on gems are available at most craft stores like Michaels and will look beautiful on the arch of your shoes!
 Dressing up your ceremony aisle can be expensive or more budget friendly. Here they grouped clear cylinders with pillar candles at about every 3 rows of chairs and rose petals heavily dusted down the aisle. This is the expensive version. You can place the same candles at the beginning of the aisle, the middle of the aisle and the head of the aisle and you can use carnation petals, which look very pretty and frilly and cost about a fourth of what rose petals cost, or even boxed silk rose petals sprinkled down a little lighter or thinner down the aisle. You will get the same feel as the more expensive set up. 
 Another very cute idea is to take an old, damaged romantic book (they used Pride & Prejudice here) and a heart paper punch and have your flower girl sprinkle these hearts all the way down the aisle. Nothing to stain your dress and very romantic!
 Dressing up your reception space is easy if you keep your colors in that neutral palette. Gold Chivari chairs are the more expensive rental but worth the cost when you consider they add a bit of bling and shine to your reception space! Remember that the smallest of details make all of the difference.
 Trying to fill up the ceiling of a large space is not only expensive, it's impossible. So pick your areas and just create a grouping, like these tissue paper pom poms, in that one space. 
 Little details like the Mr. & Mrs. hangers on the back of the chairs add another layer of romance to your day.
 Picking a venue that is already heavy with the colors of your palette makes decorating the tables that much easier. This is a very grand display but you could easily just choose crystal candle holders with large poms of baby's breath or hydrangeas and set out lots of votives to illuminate it all.
 You can find birdcages in your local craft store like Michaels. They usually come in white but you can easily spraypaint it to be whatever color you'd like. They used a very dark bronze here to give it an antique look. You don't need to tie with ribbons but just place a little "Cards" card on the front so your guests will know where to set theirs on the table. In fact, have your parents start off the trend by placing their cards in first.
 Or you can make a "Card Box". Cut the bottom out of the top and middle boxes then glue them together into the stack. These are covered in beautiful metallic scrapbook paper but you can use any type of wrapping paper for this project. Tie with a pretty bow, glue on a matching flower and stick a rhinestone button in the center. 
 Guest books are largely out of fashion because most people have figured out that they just live in a plastic tote somewhere after the wedding. However, if your guest book is filled with photos from your engagement photo session then you know it will be looked at lots of times over the years. Either have your photographer make you a photo book that has blank pages across from each image or make one yourself on Shutterfly!
 Your centerpieces do not have to be expensive. You can easily make a beautiful and budget friendly grouping for your centerpieces with dollar store containers, sand, votives and single blooms.
 Or take those same dollar store vases, wrap with rubber bands, spraypaint with metallic paint and, after dry, remove the bands to create beautiful vases or candle holders for your centerpiece!

 Even if you have the large centerpiece you can illuminate them with these little charming candles. Filled with lightly colored sugar, but you can use sand, then topped with various neutral colored faux pearls, these votives are elegant and beautiful as well as budget friendly!
 Using neutral colored favor boxes is another way of adding a layer of detail for your wedding palette. You could tie them with brown ribbon or any other neutral color like peach or cream. They put heart shaped seed hangers in theirs but you could fill it with a truffle or other candy or even a special candle if you like.
 Or purchase pre-made, pre-wrapped favors like these vintage key shaped bottle openers. These range between $1.50 to $2.50 each and all you have to do is set them out on the tables.
I have no idea who made this simply gorgeous cake but if you do please let me know so I can give them credit! It fits into the neutral color palette perfectly while being gorgeous and elegant and, did I mention gorgeous? What a beautiful centerpiece for your wedding day!

Next week we'll cover the Black & White Wedding! Until then you can visit us for daily tips and tricks at our Facebook Fan Site.

Cat

Monday, September 16, 2013

The White on White Wedding

Happy Monday! I'm on vacation from cakes for one more week but this upcoming Sunday I'll start a series called "Mini Cakes" so check back on the Cat's Cakes Blog then! In the meantime I can still be planning fun parties! 

One of the first questions a Bride is asked after "Did you set the Date?" is "What are your colors?". Now that has been something that has opened up a lot over the past three decades. You can go orange and teal or red, white and blue, or red and pink! All are very modern choices but if you are more of a traditional Bride and are longing for a truly White Wedding then I have some ideas for you today.

 Let's start off with the invitations. These are from Wedding Paper Divas and average about $1.90 per invitation (based on 100 ordered). They are beautiful and elegant and sure to set the mood and expectations of your guests without breaking your budget.
 If your budget is a little more modest then you could consider these by Invitations by Dawn which average only .87 cents per invitation. You still have the elegant look and flare but it's a bit more budget friendly.
 Now I think most Brides would love to have an over the top wedding ceremony space such as this one. But keep in mind that this comes with a hefty price tag. There are ways to save money and yes, the rental places will even have the chandeliers for hanging, but it is in no way "budget friendly" unless you have a very large budget.

 This doesn't mean you can't have a gorgeous wedding space! Also, keep in mind that some churches will not allow you to decorate them very much and will not allow anything that has to be attached. For this set up you will only need a large box of rose petals from your florist plus enough small arrangements for every other pew or chair line.
 In fact, you can make this style even more budget friendly by using large blooms like hydrangeas tied with ribbons. 
 We love this idea of printing up a "Story of Us" booklet for each seat. This can also have your program details, such as the order of your ceremony and who is who when it comes to the wedding party. But what a cute idea for your guests to read while they are waiting for the ceremony to begin.
 Speaking of using large blooms. Hand tied bouquets are gorgeous and you will be able to find many different styles from your florist, as elaborate or as simple as you desire. But if you are tying your bouquet yourself or having your planner do it then save a bit more and fill your bouquet with larger blooms like cabbage roses and hydrangeas and then accent with the smaller more delicate flowers.
 One of the most fun ideas that we have come across this season has been The Photo Booth! Now you can rent one for about $1500 for your party but you do not need to go to such expense! Set up an interesting background (that can even be a flat sheet or length of fabric on the wall) and then stick out a bucket of props for your guests. Have a friend click the shutter and then give out the photos after your honeymoon! Too much fun!
 If this is still out of the question or just not your cup of tea, remember that any frame can add a bit of personalization to your day. Print out any sayings or display your engagement photos, family wedding photos or even childhood photos for your guests to enjoy.
 If you have a huge budget for decor and flowers then this is a stunning reception set up. You can save some of your budget by purchasing the tall glass cylinders in bulk and the flowers from a local flower market.
 However if your budget is a bit tighter when it comes to the decor then maybe scale it down a bit with a few big blooms in different levels of glass vases and add candles to help set the ambiance.
 Baby's Breath is a great cost cutter that can look absolutely gorgeous! You can make one of these large flower balls for almost no money and then accent the tables with smaller bunches in silver painted vases from the dollar store. You can even pick those candle holders up there too and just spray paint them and top with inexpensive pillars.
 But if your budget is even tighter or you just don't like the look of flowers on the table then here is a "flowery" idea that will be very budget friendly while being gorgeous as your centerpiece. Get a case of mirror tiles at the hardware store, a couple of yards of lace from the fabric store and some plain containers. Cut out the lace patterns so you have several pieces or strips. Then use white glue to attach it to the outside of the containers. Drop in a tea lights or even battery powered "votives" for a beautiful look. 
Paper lanterns can be purchased very inexpensively and battery powered lights can be inserted inside each one before hanging to give you a beautiful dance area. Just remember that a dozen lanterns won't give you the look you are hoping to achieve. There are at least 75 that were used to get this look along with twinkle lights. At an average of $2-$7 per lantern you will spend about $200 to $700 per set up but this is still fairly inexpensive compared to the "average" reception decoration set up of $4000. 
 Fortunately places like Michael's have stepped up their game and items like these white letters are easy to buy for about $3 each! I love the photo idea but you could use these on the cake table, the guest table or even on the sweetheart table for the Bride and Groom.
 Favors can average between .50 cents and $10 each. The rule of thumb is that if you can afford the more expensive favor then pick something you think your guest will really use in their homes. If you are on more of a budget then pick an edible favor that you think will appeal to most of your guests. These coasters from Beau-coup.com are about $2 each for 4 coasters per set.
 An easy way to present an edible favor is to find pretty little gauze or tulle bags which can cost between a quarter to $1.25 each depending on the style. Fill with candy, cookies or other treats for your guests and keep your budget intact. ETIQUETTE NOTE: Don't skip the favors. Your guests have made time to come and celebrate with you. Some have come a long way to see you, most have dressed up and some have purchased new clothes for your event. Most will have brought you a card or gift. So take a few dollars from your budget to present your guests with a favor that says "Thank You So Much For Sharing In Our Special Day!"
 A gorgeous wedding cake is usually part of the dream. Not every Bride will want a wedding cake but most of your guests will expect you to have one. There are three types of wedding cake. The over the top "we are going to make sure we can afford this amazing cake" Custom Cake design. For this cake you are paying for the personal attention and creation of the artist, a one of a kind cake design that you will never see at another event, the time and cost of all of that detailed piping, and the WOW factor for your guests when they walk into the room. A cake like this will cost between $4 and $20 per slice depending on the level of detail, the size of the cake (those with bases larger than 12 inches are more difficult to decorate and to deliver) and the reputation of the decorator. A cake this size feeds about 200 people so it would average between $800 and $4000. 
You can save some of the cake budget by going with a more plain cake as your base and decorate it up with fresh flowers. However, talk to your cake designer to see if you could use sugar flowers for a lower cost. Even if it is the same cost, sugar flowers have a bigger WOW factor, so use those if you can. This cake would average between $3 and $6 per slice so you can see the way it's a lot more budget friendly. Because each tier is larger on this cake than the one above, it feeds about the same amount of people. So it doesn't matter if you have 5 smaller tiers or 4 larger ones, the cost of cake is "per slice". So while the second cake looks smaller it really isn't smaller. It has the same amount of slices in total. But because it's is much more plainly decorated it will cost much less.

The last option is a "grocery store" cake. Most of these cakes are just not good. However, we have come across some that are fairly good and they are definitely budget friendly. Make sure you taste test these cakes carefully before ordering. 

Whichever option you choose, remember that you will have to pay a 50% deposit when you book your cake. Most designers are booked up months in advance and since wedding planning usually begins about a year in advance some are booked for summer weddings a full 12 months earlier so don't wait to book your cake.

A white on white wedding can be very elegant and romantic looking. It can be as extravagant or as budget conscious as you need or want it to be. Using a planner can help you to make your dreams come true simply because they usually save you more than their fees and they really can DIY things to save you money and yet give you the wedding of your dreams. 

Next week we'll dive into color! Over the next few weeks we'll go from subtle to extremely bold for the wedding color palette and, hopefully, find the look of your dreams along the way!

In the meantime you can get daily tips and tricks on our Facebook Fan Site every day!

Cat

Tuesday, September 3, 2013

 Happy Tuesday! If you read our Cake Blog then you know it was Jilly's Hot Pink and Zebra Striped Birthday Party this weekend! We celebrated in a park with a bunch of family and friends. Now, when your Nana and Aunt are Party Planners you know that it's not just going to be plastic tablecloths and paper plates...nope it's going to be ZEBRA tablecloths and PINK paper plates and MORE! LOL! But seriously, it really is just a little "park party". So today we are going to share some of our tips on how you can take a park party and jazz it up a bit.
First off , of course, is the invitation! These from an Etsy vendor cost me about $10 for the digital copy that allowed me to print off as many as I wanted. Since this was just family and close friends I was actually able to email this to them! Saved on postage but I still have the digital file so I can print one out for a keepsake. It definitely sets the theme, right?!
 Of course Tory made awesome water bottle labels! Since it was planned for the first of September you never have any idea if that is going to be a 70 degree day or a 95 degree day. So we made sure to have lots of water for everyone. Since we were having it at a park that not only had one but TWO playgrounds, the kids made good use of the water too! These cute labels were printed on sticker paper by Kinko's so all she had to do is trim, peel and stick! Ok, it's a bit more than that and she's really really good at it now after lots of practice but it's still fairly easy to do. But they look totally awesome and really added to the table decor!
 I found these little zebra striped heart shaped stickers at the scrapbook store and just stuck one on each of the pink and white plastic cups.
 Zebra Zebra everywhere! So I used plain pink plates, in dark pink and light pink, for the food as well as plain white and pink plastic flatware because there was so much zebra everywhere! Zebra napkins, zebra favors, zebra balloons, zebra cake...even the tablecloth! I put down a plain white tablecloth then topped it with the zebra "runner" and finally unfolded a dark pink table cloth just enough to make a strip of pink right down the middle of the table. Now it was really, really...no, seriously, really windy there so I was pretty happy that I held all of these layers down with tablecloth clips. The ones I have are stainless steel and there are 12 of them. They just clip right onto the table edges to hold down the tablecloths. Seriously needed on that day and they were less than $5 for the set! 
 The favors were cute little dollar treats from Target and Party City. Pretty hair bows and bracelets for the girls and trucks, sunglasses and planes for the boys with fruit snacks for everyone! The Barbie silhouettes were from another Etsy vendor! I used them for the favors as well as for the banner so it was a good purchase. For the favors I got the treat bags (about $2 for 24) and then cut out a circle of white paper and glued the Barbie silhouette on top of that. I used double stick tape to attach it to the bag and then a sticker alphabet to add the initials of all the girls.
 The back of each one, to hold the bag closed, was this sweet little Thank You sticker. (click on the photo to read the saying) This is also from an Etsy vendor and it was just a few dollars for 12 of them. The girls bags had the silhouette on the front and these on the back and we only used these on the back for the boys so we could easily tell them apart from the girls favors. Each bag was filled then tied with a white ribbon bow and finally sealed with the Thank You sticker. SO cute!
These were all placed on the gift table until it was time to hand them out!
 Here is the whole set up. The banner was just made from squares of scrapbook paper layered with circles of scrapbook paper, the Barbie Silhouettes added to the center and then a sticker alphabets spelling out Happy 4th Birthday! The Birthday Girl took that home after the party to go up on her bedroom wall! We topped off each corner with bunches of pink, white and zebra print balloons! You can just see the center of the pop up canopy in this photo. We filled it up with paper pom poms and paper lanterns.
This is why you never get rid of good decorations! You can use them in different ways for other parties! The pink pom poms are from a baby shower, the white lanterns from a wedding and the zebra striped ones from the dollar store! What an easy and affordable way to add more detail to even a "Park Party"! 
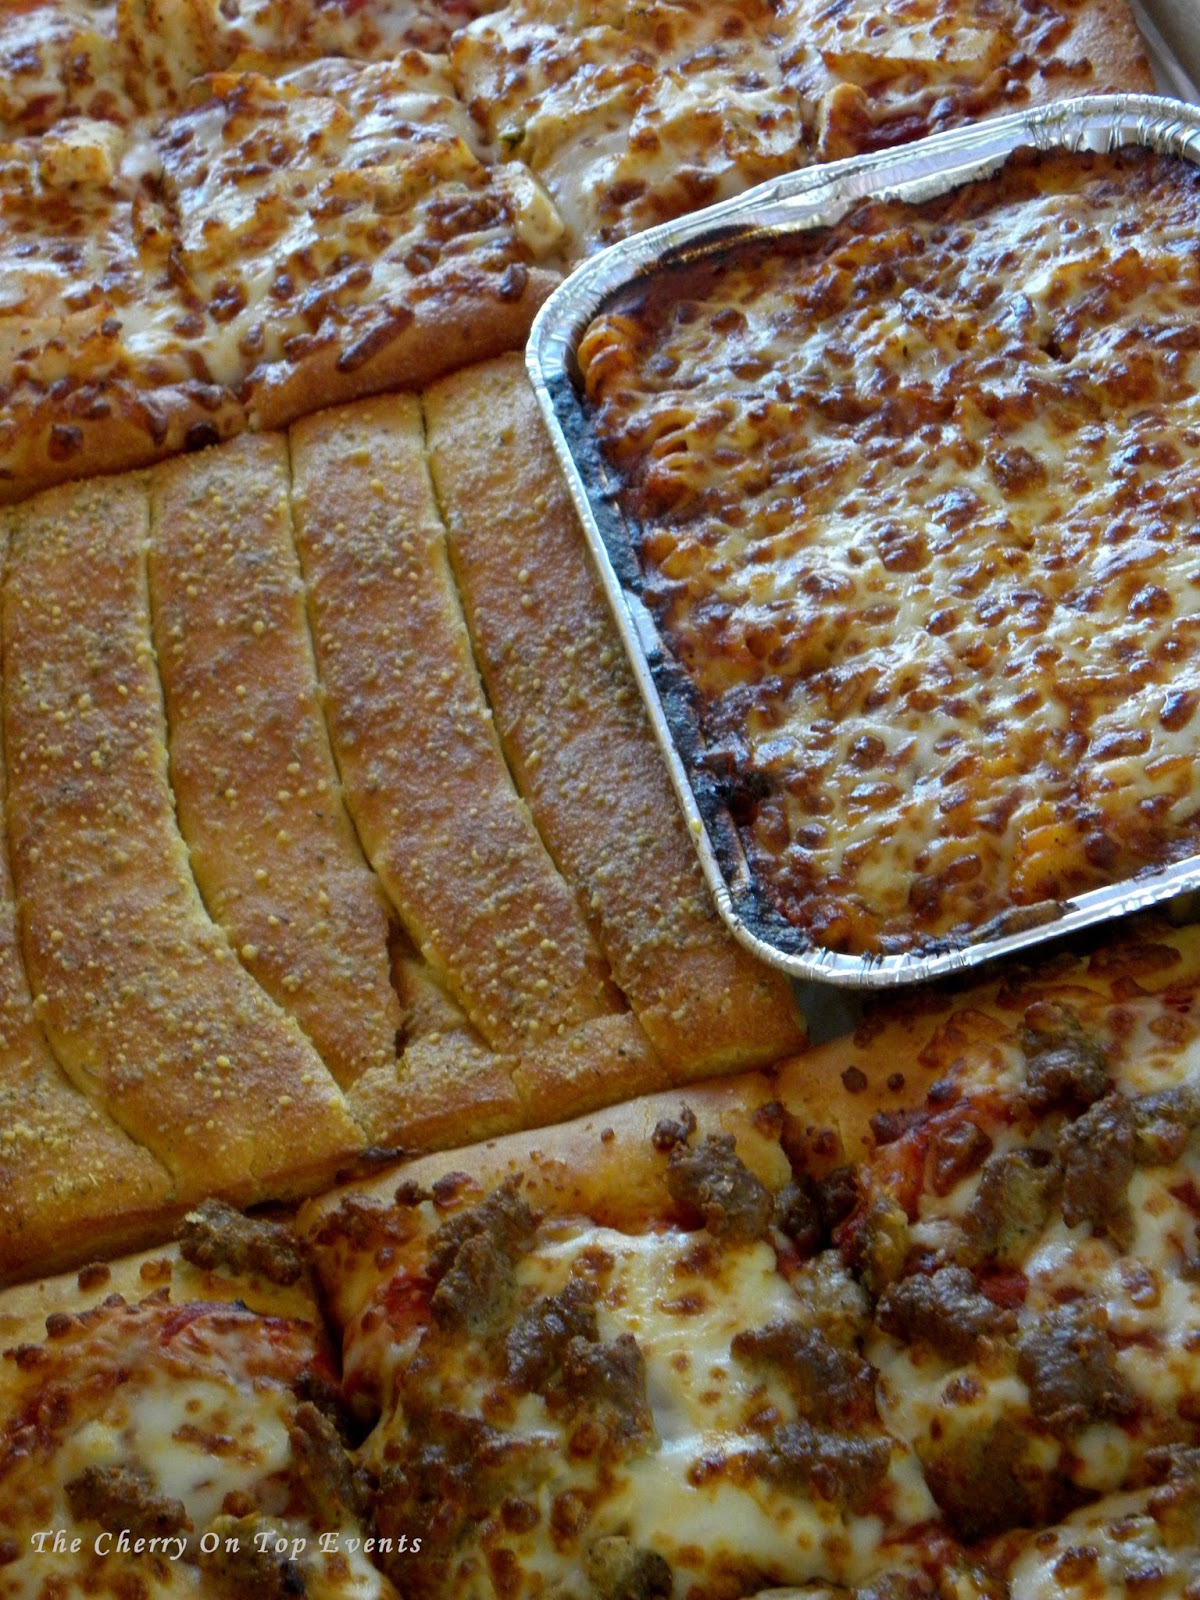
 Keeping in mind that it was a park party we wanted kid friendly, park friendly food. So we went to Pizza Hut for their big box dinners! We got four different types of pizza, two different types of pasta and lots and lots of bread sticks! Here is the cheese and pepperoni pizzas with the chicken alfredo pasta.
 And here is the grilled chicken and sausage pizzas with the marinara pasta and bread sticks!  
 Even the Birthday Girls was dressed up for the theme! In a black and white dress with a hot pink sash and flower she fit the bill perfectly! She got this adorable necklace from Costco!
 Even the hair bow fit the theme! Once again, Etsy to the rescue! 

 After lunch we had ice cream! You can buy individual cupcake "clam shell" containers. I just scooped a couple of small scoops of ice cream into each container the night before, let it freeze up solid over night and then plopped it down into the ice of the cooler until it was time to serve it. The spoons are novelty spoons that change color when they hit the cold!
Finally there was cake! You can find out all about how Barbie was dressed up over at our Cat's Cakes Cake Blog and see what the back of this dressed up doll looked like too! Barbie was dressed up to the Nines for this party, right down to the present in her hand and her zebra striped candles!
It was even zebra striped INSIDE! The double chocolate and vanilla cake was baked in a way that makes zebra stripes on the inside of the cake when it's baking! Too cool! And yummy too!

Next week we'll share with you a football themed party! Until then you can always visit us over at our Facebook Fan Site for daily tips and tricks!

See you there!

Cat