Sunday, October 28, 2012

I've mentioned before that I love working our own family celebrations but this time I think it was the best one I've worked on yet. On November 7th my husband and I will have been married for 25 years. Yup, quite the milestone. We are still married, still happy and no one has killed the other...yet. So we wanted to celebrate it up with our family in big style. Here is our "World Travelers" Anniversary Party.


 First things first...the Invitations! Since I only needed a dozen invitations I was happy to DIY these myself. While traveling up in Portland I found a set of plastic envelope templates. I bought scrapbook paper with a pattern that match our design and just traced and cut out the envelopes. These were perfect because they had a spot on the front that worked well for the "To" part of the addressing. One thing to note. If you are putting the "To" in an unusual place on the front of your envelope then make sure to put the "From" on the back so that there will be no mistake on where the invitation goes for the Post Office. These were standard greeting card size and weight so they didn't require extra postage but always take one to the Post Office and have them tell you how much postage is needed. I bought stamps that have Tall Ships on them to match our concept!
This is the actual invitation. I found travel clip art online and when I did the set up for the wording I just inserted the clip art where I wanted it to be on the invitation. I printed that out on buff colored card stock and trimmed it down to size. The map printing was a bit harder since I wanted each invitation to be backed by a map from a different city that either I or my husband had visited in our travels. The hard part was finding map images online that had a high enough resolution for printing out big enough for the invitation. I printed them out on the same buff colored card stock and then layered the dark brown, the map and the printed invite using scrapbook glue to hold them together and make the edges solid. 

Now onto the party set up. A great design lies always in the details. You want to keep your tables simple but still convey your concept in all the little details that make up the final look. We started off with these canvas tablecloths. Here is the secret. They are painters drop cloths! Yup, they come hemmed and finished for about $12 each which is a lot cheaper than actual tablecloths. And these we are guaranteed to use again! They stood up to all of the kids messes and can just be washed...and if the stains don't come out no one will be panicking!


The vases are just Mason jars. You all know how much I love using Mason jars so when it came to my own event I just couldn't resist. But I wanted them to be original looking. As a AAA member I can get as many maps as I like so I sent away for a bunch of different ones and then set about using the map paper for various parts of the concept. For the centerpieces I just cut a rectangle of map paper and used a glue stick to  stick the overlapped edge together. I then used twine and gold jewelry wire to tie the neck of the jar along with an antique looking key. I bought the keys in bulk from an Etsy vendor in London. They are perfect! When the time came I just popped the grocery store mixed bouquets into the jars and set them on the table. Since the map colors are so varied I could use varied flowers and colors for these centerpieces.

The letters were really quite easy to do. It's simple decoupage. I glued map paper to the letter, trimmed the paper down and then put on two more coats of glue on top. Map paper is so thin that when you add the glue on top it wrinkles wonderfully giving texture to the letters as well as design.

The wooden words were already finished so I didn't have to do anything to them. They all were bought at Michael's. They have lots of precut, prepainted words that you can use. We used Live and Laugh to go with our LOVE. 

The frames are just dollar store frames with sayings printed on cardstock. Easy as that but they gave the other side of the table a focal point and decor. I had to figure out our "number" but I loved the way these tied into how long we have been together since we met, since we fell in love and since we were married.

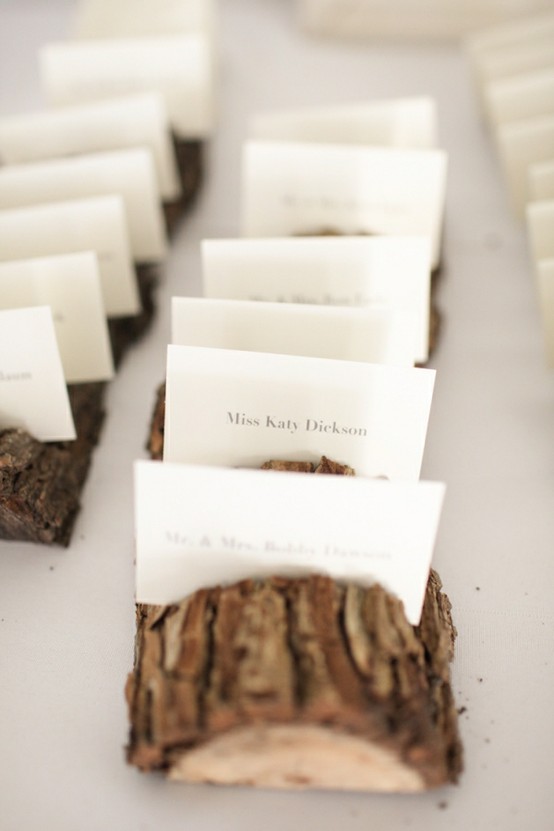
To continue the travel theme I took wine corks, hot glued them together and then, using floral and jewelry wire, created the photo swirls for these Seating Cards that are also favors for our guests. I added one of the keys to each one before tucking in the cards. Like the invitation envelopes I just used a plastic template and map paper to make the envelopes and then printed out the cards onto buff cardstock. The clip art was added the same exact way as the invitations and helped to tie the two together for our concept.

The favors were Murano Glass wine stoppers, bottle openers and compacts. I really wanted to use them because of my love for Venice and the glass blowing demonstration I was able to see with my Mom when we were there.

I just used map paper to wrap them and added a tag with butchers twine. I got a 3 pack of butchers twine at Michaels that had 3 different colors so I just alternated the colors when I wrapped the favors to give a bit more color to the whole table.

The kids were treated to M&M's in little glass or plastic jars. The jars were just spice jars that I had collected over the months leading up to the party. I just washed them out and stuck them back until I needed them. I found "luggage" stickers online, a whole book for $8, to use to decorate them. Finally, after filling them with the candy, I topped each jar off with a cap of map paper and secured that onto the jar with more butchers twine and a favor tag. These doubled as Seating Cards for the kids too.
Personalized Water Bottle Labels are sort of Tory's specialty so I usually just let her have a go at the project but this time I really wanted a hand in it. So, together we came up with these gorgeous labels that have our information on the front and maps of Paris on the back. Perfect!
And this is how it all fit together on the table along with the Old Spaghetti Factory place mats and flatware set up. The idea was for our concept to fit in seamlessly with the restaurants decor and it did that wonderfully. 

Onto the cake table. I used an older briefcase as a stand for my World Travelers themed Anniversary Cake. 

The bottom tier is modeled after a vintage man's valise and the top tier is modeled after a vintage woman's train case. I added the saying, "No Matter Where In The World I Travel, The Best Part Is Coming Home To You" since, in the span of our marriage, we have traveled together and separately, but whenever we were apart we always missed each other terribly and coming home is always a wonderful part of the journey. 

Also on the cake table is the heart shaped plaque made from more wine corks and more map paper to tie it into the concept. 

And finally the "Guest Book" is actually the small scrapbook I will be using to place all of the party photos and now it has all of our guests well wishes written on the inside cover!

Dinner was held a The Old Spaghetti Factory in downtown Sacramento. This was chosen because it was the one dinner out that the two of us had on our original honeymoon 25 years ago. So if you are trying to decide where you want to have your event try to tie it into your theme or have it be a personal connection to you and your spouse. We got lucky. Not only is the decor vintage, the food is Italian and it has a very personal connection for us. Perfect!

I have to give out a huge Thank You to the Old Spaghetti Factory in Downtown Sacramento. You guys seriously rock. From helping me get the area ready for the set up, helping me with the mats and flatware at the set up and then helping with the very quick break down...and that's not to mention the amazing service in between! Yup, you guys seriously rock!

Also to my husband who helped make this day come together behind the scenes and in front of most of our family, I love you.  We even, unintentionally, gave each other travel themed gifts. To him was a compass from London and to me were Eiffel Tower earrings from Paris. 

To my partner, Tory, for helping behind the scenes and reminding me why we are such a good team, and to our family who attended. I know it was a bit to get there, it went later than we intended and that some of you were not feeling all that well but came to be with us anyway to celebrate. 

I hope you enjoyed our little celebration and that it gives you ideas for your own! See you next week!

Cat

Tuesday, October 23, 2012

Happy Tuesday! Ok, I'm one day late this week but I have a good reason! We were celebrating my 50th Birthday with lots of family this past weekend so the blogs were kicked by just one day. But we are back and, as promised, bringing you week #2 of Country Weddings. We are calling this one the Burlap and Lace Country Wedding Plan.
 We start off with this luxurious invitation from bstudioweddinginvitations.com. Now here's the catch. Not everyone can afford the $11.50 price tag. But they why should you? These are just regular invitations that have been wrapped with lace, tied with ribbon and have a jewel glued on. These are a VERY easy DIY project, even for 100 invitations if you need them, for about $3 each. 
 Unfortunately, unless you have a master woodworker in your family, this stunning archway isn't a DIY project. However it shows how you can dress up an outdoor venue and make the head of your altar simply gorgeous. The beautiful lace curtain panels let in light , give texture and set the stage.
 And talk about setting the stage. Flower girls don't have to carry or scatter flowers anymore. How adorable is this little girl with her tutu and cowboy boots announcing the Bride's pending arrival?!
 If you are planning this event at the rainy or snowy time of year and choose to have your ceremony indoors there are many ways to dress up a refurbished barn to make it look a lot more elegant. When the ceremony is over simply change it over to the reception space. You can make one side of the barn a cocktail area while the change is going on or, if it's not raining, move the cocktails to an outdoor area you have set with cafe tables and chairs along with a bar set up.
Lighting in a barn can be challenging but not impossible. Twinkle lights work very well for those high rafters as well as mason jars with votives hanging from the beams. Very country and very beautiful.
 For your Escort cards you can easily DIY these adorable versions. They are just buff colored card stock with mini paper doilies folded over and glued on. Set out on a pretty tray and you have a lovely presentation.
If  you want to incorporate flowers into your Escort Card presentation then here is a very easy way to do it that is just stunning! Fill the rustic box with oasis blocks that have been damped with water. Stick in bunches of babies breath flowers and then, using the branches of the babies breath, tuck the cards down into the blossoms. Beautiful!
 You can pull the lace idea into your place settings by using larger paper doilies under clear plates. Just an easy way to add some extra texture to your tabletop.
 Also an easy way to add texture is to use actual burlap for your tablecloths. These have a row of lace edging the ends. What a beautiful way to add to your theme. It's the little details like this one that make up a really special wedding plan.
 You don't have to go crazy with flowers for a country wedding. The ambiance of the barn, the burlap, the lace, the lighting is enough to set the mood. So keep your arrangements simple. I love the use of mercury glass jars and vases to display the little bouquets of roses. Scatter some votives or tealights and you have a gorgeous table setting!
Want to add one more layer of detail on your tables? Just wrap your flatware in a large paper doily and tie with twine. Rustic and lovely all in one package!
 And now onto the Favors! Favors are a very nice way to say Thank You to your guests. Just a small token that says how much you appreciate the effort they went to in order to share your special day with you. That doesn't mean they have to cost a lot of money. I love the idea of this cookie bar set out with small paper bags for their guests. I love how the jars are wrapped with burlap and lace to fit the wedding design. Have a sign on the table that says "Pick out a couple of cookies to take home with you!" and your guests will know that these are for them, they are a favor and that there is something else for dessert on the way!
 However, you don't have to stop at one favor. I have been to events where the guests were handed personalized water bottles at the ceremony, found little edible favors at the Escort Card table and then another small favor to take home that means something to the couple. I happen to know people who have honey bees and bottle their own honey. If you live in a region that is famous for something or you as a couple have a little treat that means something personal to you then consider an extra favor like these adorable little honey jars.
 When you are taking your "couple" photos make sure to let your photographer know you want to take a "Thank You" photo as well. There are so many ways to do this shot and I even heard of one this week where the Bridesmaids and Groomsmen held the letters up over the heads of the seated Bride and Groom who held a wooden heart in their hands. SO cute! Afterward you can either use this photo to make your thank you cards or tuck in a copy with the ones you ordered with your invitations.
Finally there is cake. We love the presentation of this Wedding Cake. Set the "table" with burlap and place upon it a "lace" covered cake. Add touches of your wedding flowers that match what is on the tables and you have a very well coordinated cake table! Simply lovely!

And speaking of weddings. Next week you get a peak at one of our own family celebrations. My husband and I will be celebrating 25 years of wedded bliss with a very special family event. We are pulling out all the stops and can not wait to share it with you all next week!

Cat

Monday, October 15, 2012


Happy Monday! The next two weeks we are going to be spotlighting the hottest of Wedding Trends...the Country Wedding. I found so many ideas on this theme that I just couldn't fit them all into one blog post! So what I did was put together two wedding plans for you to enjoy!
This first wedding plan is what I'm calling the Sunflowers & Lovebirds Country Wedding. The sunflowers on a background of dark wood fence is the perfect mood setter for this theme!

One of the cutest details I have seen this year is the "Sign Post". These invitations are perfect if you are following this theme and plan to have a sign post like the one pictured below!
 Just hand paint some signs and nail them to a board then stick that down into a plant or a planter filled with flowers. All you need is rock or soil to hold it into place. Use just one sign post to show the way to the "I Do's" to the "Eats" to the "Drinks", etc. or use multiple sign posts for different areas! SO cute!
When it comes to the ceremony I know that more Bride's have an issue with flowers for the guys. Many just cop out with the single white rose and call it a day but if you are using rustic touches like burlap in your theme why not have your florist work it into the flowers as well!

And we don't need to leave out the Bride and her flowers either! Burlap and raffia can be used to tie up her bouquet to give her flowers a rustic Country feel as well.
 One of my favorite "thinking outside the box" ideas I have seen this year is this one. Have your guests sign a bench with sharpies for your guest book. Then you can sit that bench proudly on your front porch and enjoy it for years. Want the signatures to last? Then after the wedding seal those in with a finish coat that will keep them from fading for years. I just love this idea!
Often a Bride will want a Country Wedding because she lives in the country and near a spot that has enchanted her for her ceremony. Find a big tree, hang ribbons with lanterns on the ends or streamers of flowers over the branches and make that your backdrop. I love the heart they "carved" onto the tree with paint.

Continue your sunflower theme by lining your aisle with them! The great thing about this is that the sunflowers are a very heavy flower and won't fly away if there is a breeze like rose petals will. Just keep in mind that these are not for the middle of the aisle. Not fun to step on!
Just because you have your reception in a barn doesn't mean it can't be elegant. Hang lanterns from the cross beams and twinkle lights from the stalls for your elegant lighting. The drapes can actually be made from canvas from Painter's Drop Cloths...yup, you read that right...painters canvas. A highly cost effective way in order to save some money and create drapes to dress up your venue!

 In between your lanterns over your food and drink tables hang some sunflower pomanders. These are a spark of color that continues your theme right where your guests will congregate several times throughout the evening.
 I'm always looking for new ways to display Seating Cards. Long split logs which have had slots notched into them are a great way to add rustic to your display as well as unusual.
 Continue that idea onto the tables by making Place Card displays out of single splits of wood. This ties the idea together from the front of the reception space to your tables.
Do you both come from a family of "Long Marrieds"? How about displaying their wedding photos or just recent photos of these wonderful couples at the entrance to your reception space. Maybe behind those Seating Cards? Or maybe display your Engagement Photos instead? It's a cute way to personalize this as YOUR wedding day.
 You can buy wooden bird cut outs at any craft store. Use a brown marker, if you don't own a wood burner, to shade the edges and write the words then attach twine to each bird so you can then tie them to the Bride and Groom's chairs.
 The guest chairs can be decorated as well. Remember those painter canvas drop cloths? They can be cut into strips and knotted onto the back of any "slat" type chair. Lovely and inexpensive!
Finally there is cake. Buy two more of those bird cut outs and decorate them like you did with the chair decorations and attach them to food safe skewers for the top of your cake. If this had been my design there would have been little sugar sunflowers where the bling is on this cake but this makes for a very pretty display.

I love so many of these ideas that it makes me want to get married again just so I can use them! Hope they gave you some great ideas for your special day!

Remember to check back next week for even more Country Wedding ideas!

Cat